Port Forwarding
Port forwarding lets you expose one or more ports of a cloud desktop to your local network or the internet. It's particularly useful with Remote Desktop Protocol.
You can use this feature on DaDesktop Course machines (which need a private server), DaDesktop For Work, or Standalone machines. Keep in mind that the interface might look a little different depending on the machine type.
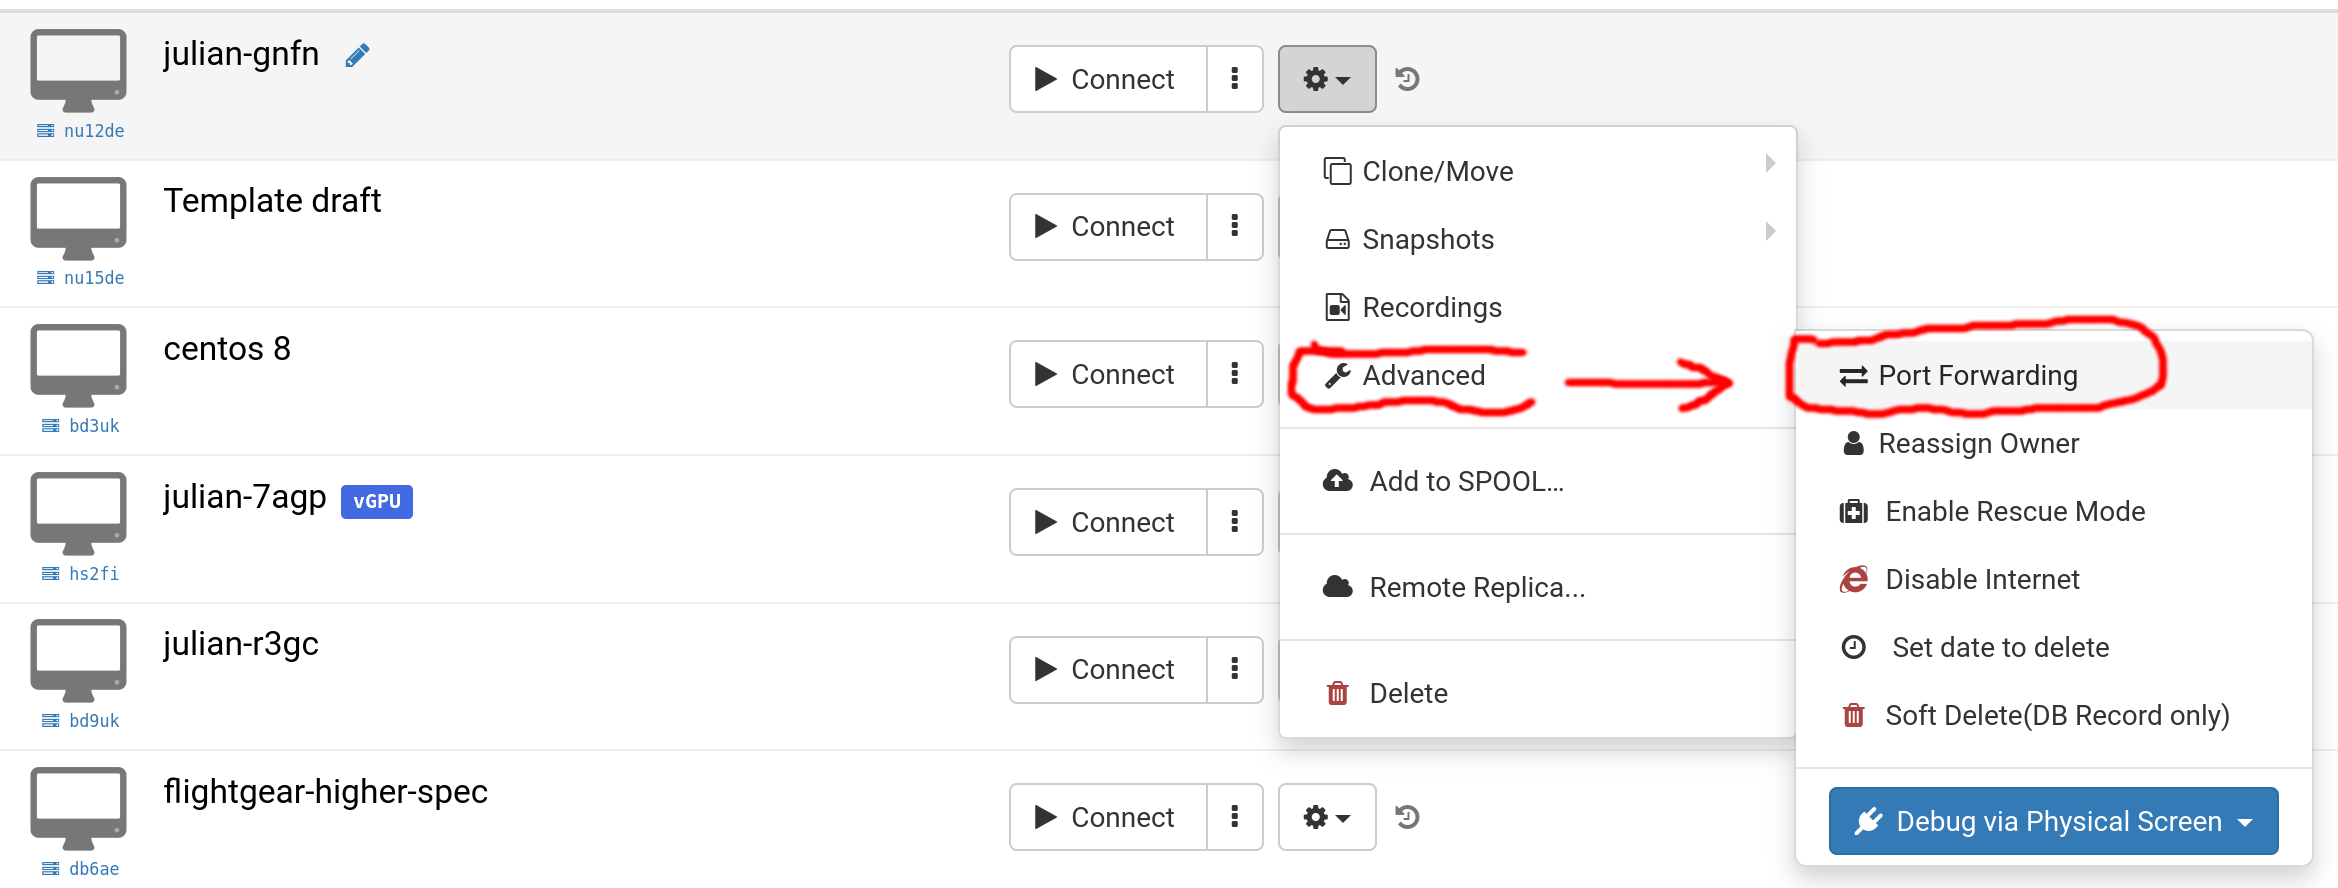
Select 'Advanced' and then 'Port Forwarding'.
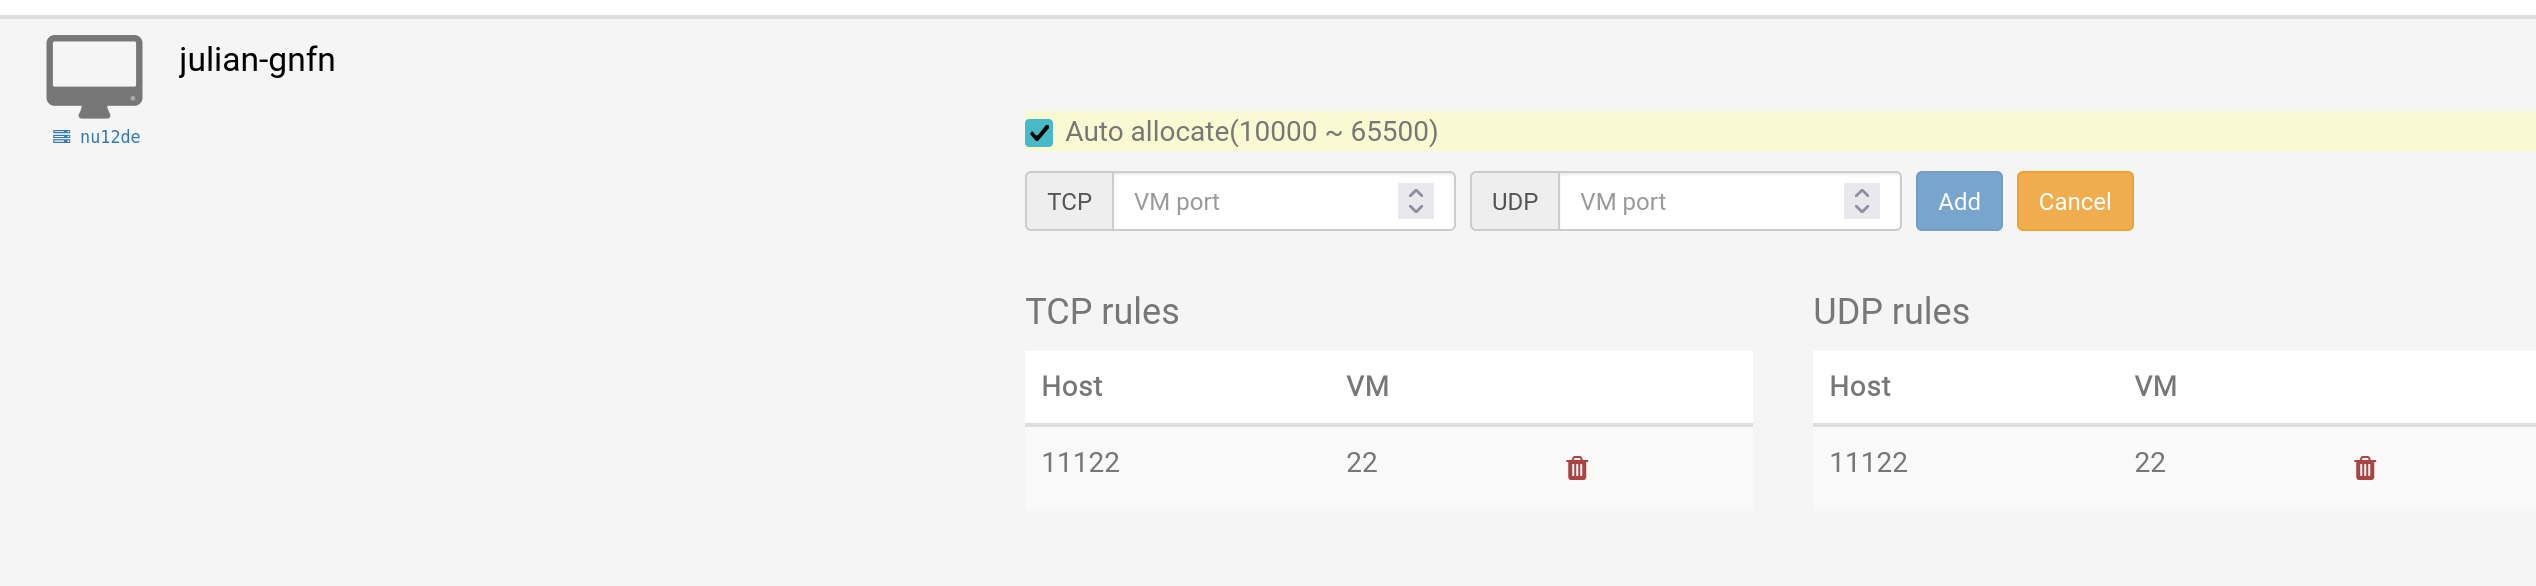
You can set up port forwarding using either automatic or manual allocation. Auto allocation simply grabs the next available port on the server, which is often the easiest approach. But if you need control over specific external ports (from 10000 to 65500), manual allocation lets you pick each one. Any manual port forwards you've added before are saved and can be edited later.
Auto Allocation
Here's an example of auto allocation, with a manual port forward already in place using port 11122 on the host and port 22 on the virtual machine.
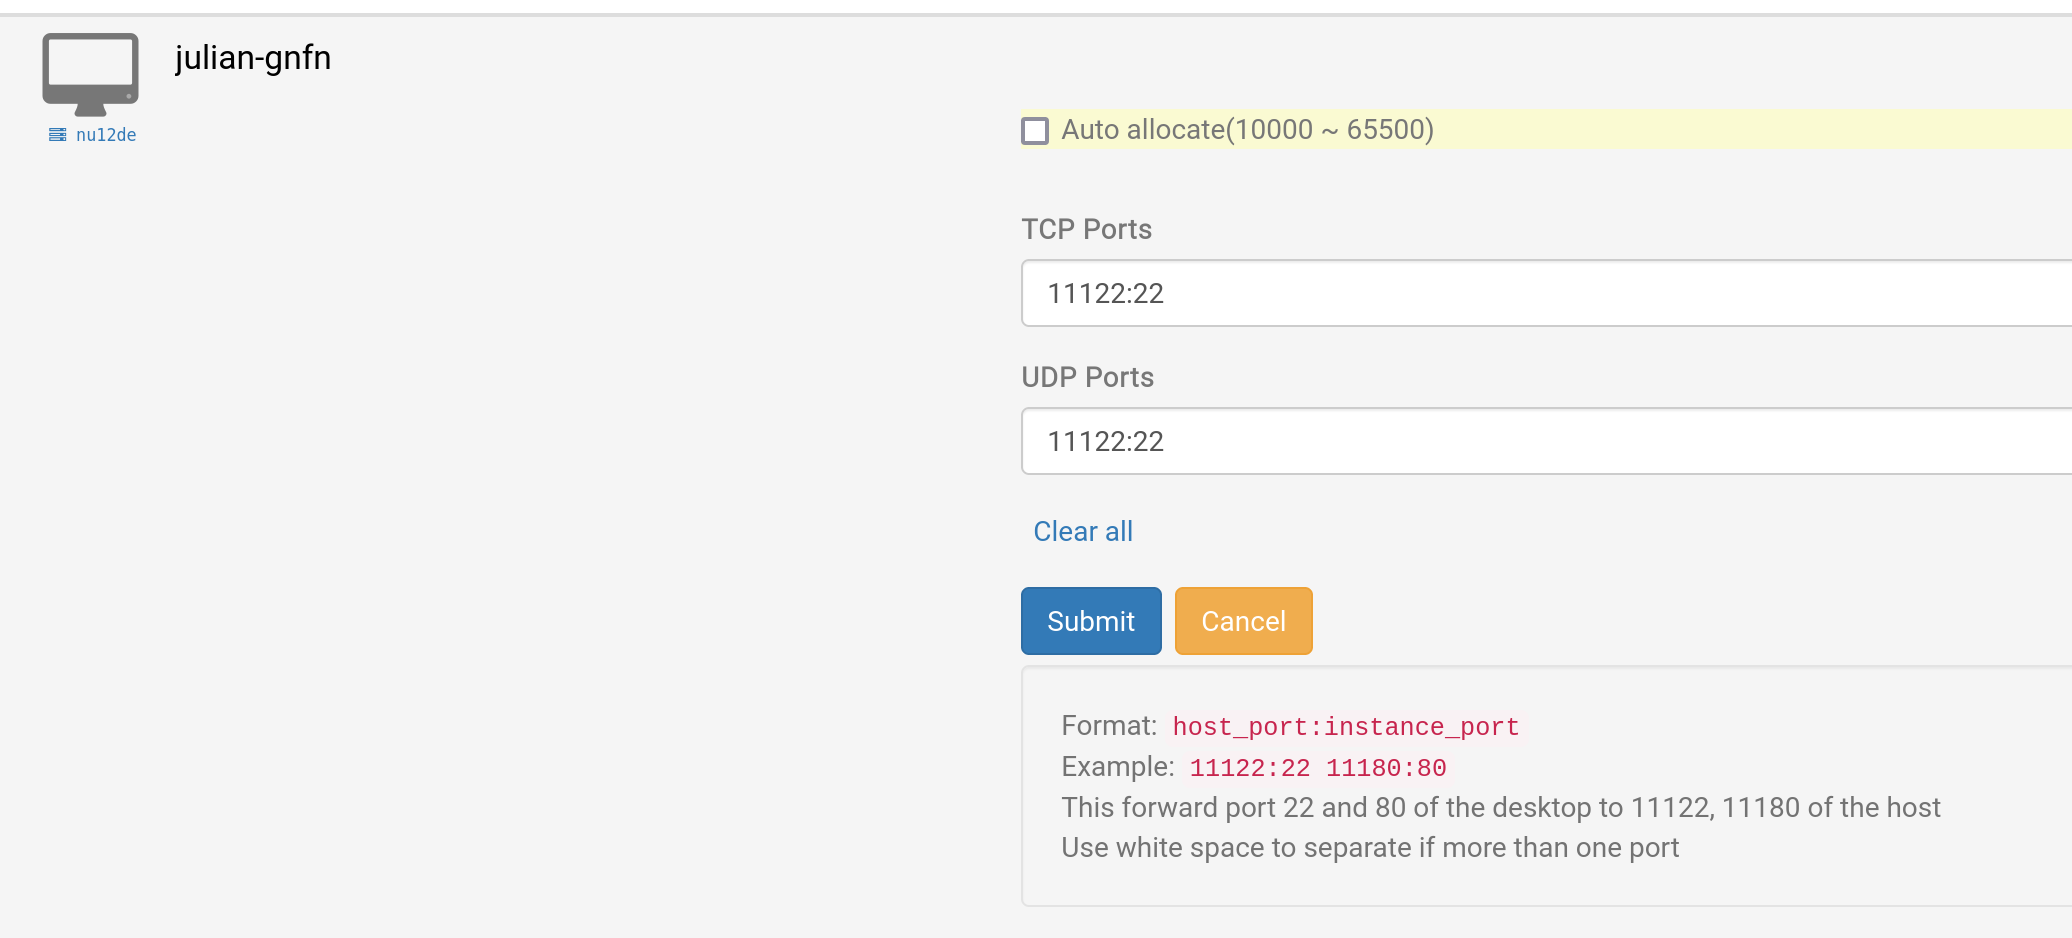
Manual Allocation
In this case, port 11122 is being used for both TCP and UDP forwarding to port 22 on the cloud desktop VM for SSH. You can choose different TCP and UDP ports if needed.
Example for Windows RDP
This example sticks with manual allocation, but of course you can also use auto allocation if you prefer.
1. Locate your DaDesktop machine and click "Port forwarding". Then define your TCP ports for the remote connection—you'll need to specify an external port number and the internal port 3389 (for instance, 66666:3389). Make a note of your port number; if you forget it, just open the Port forwarding settings again to check.
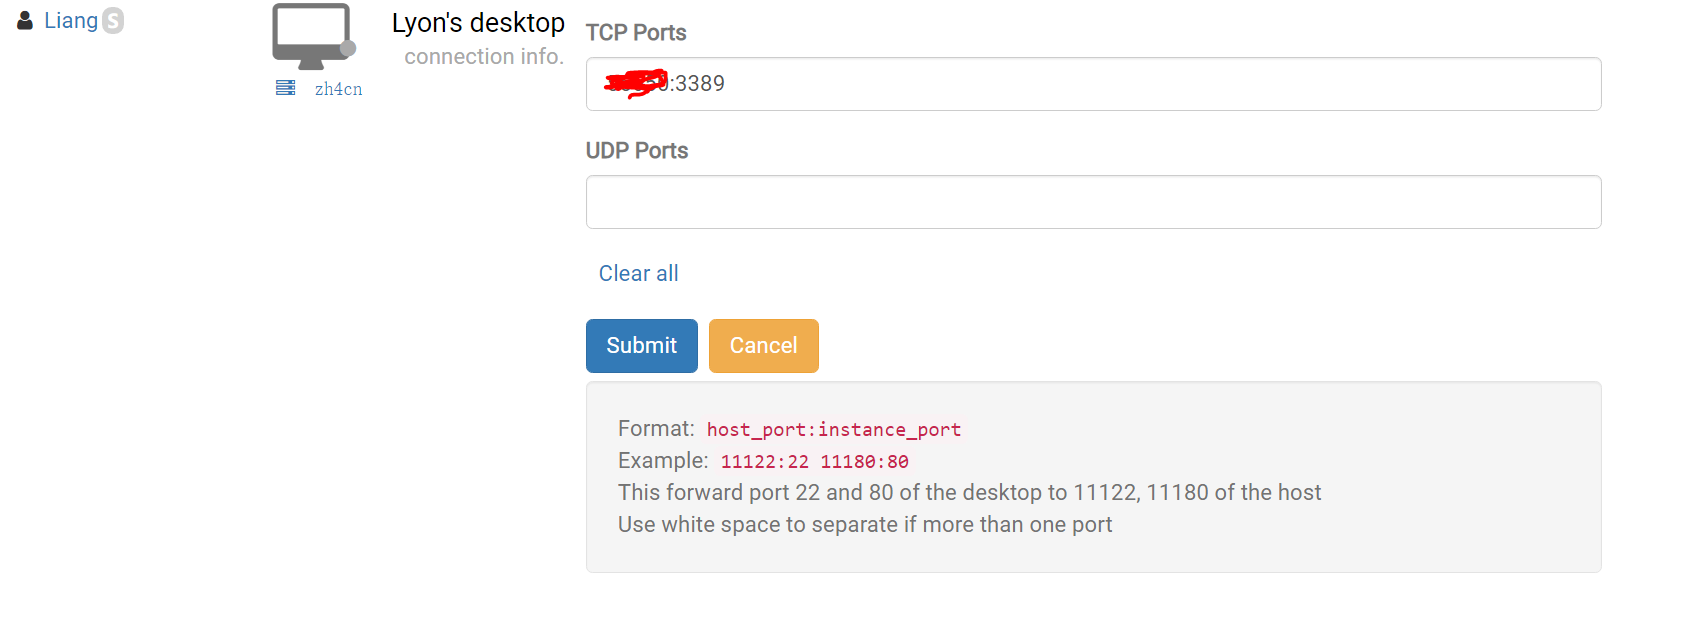
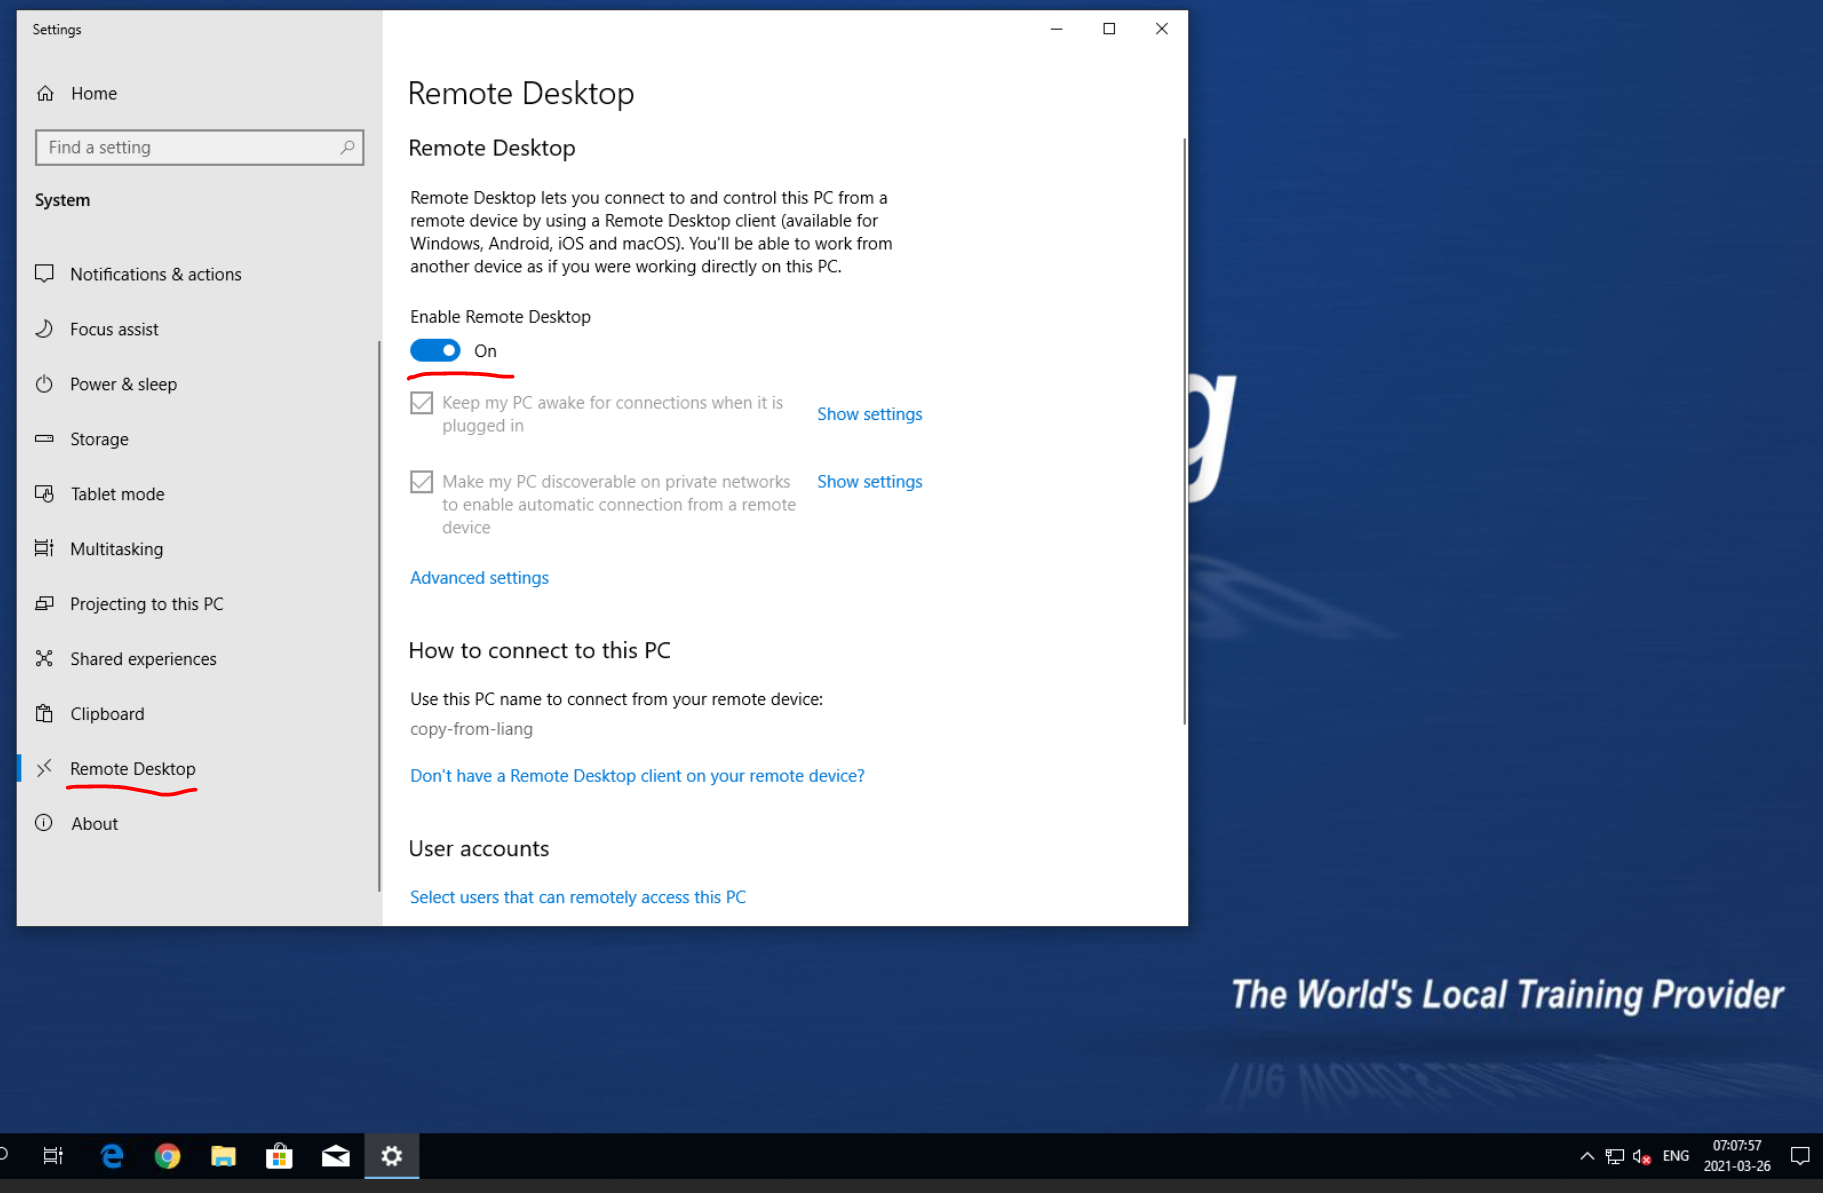
2. Submit your settings and set a password inside your Windows DD machine, then click "Enable Remote Desktop".
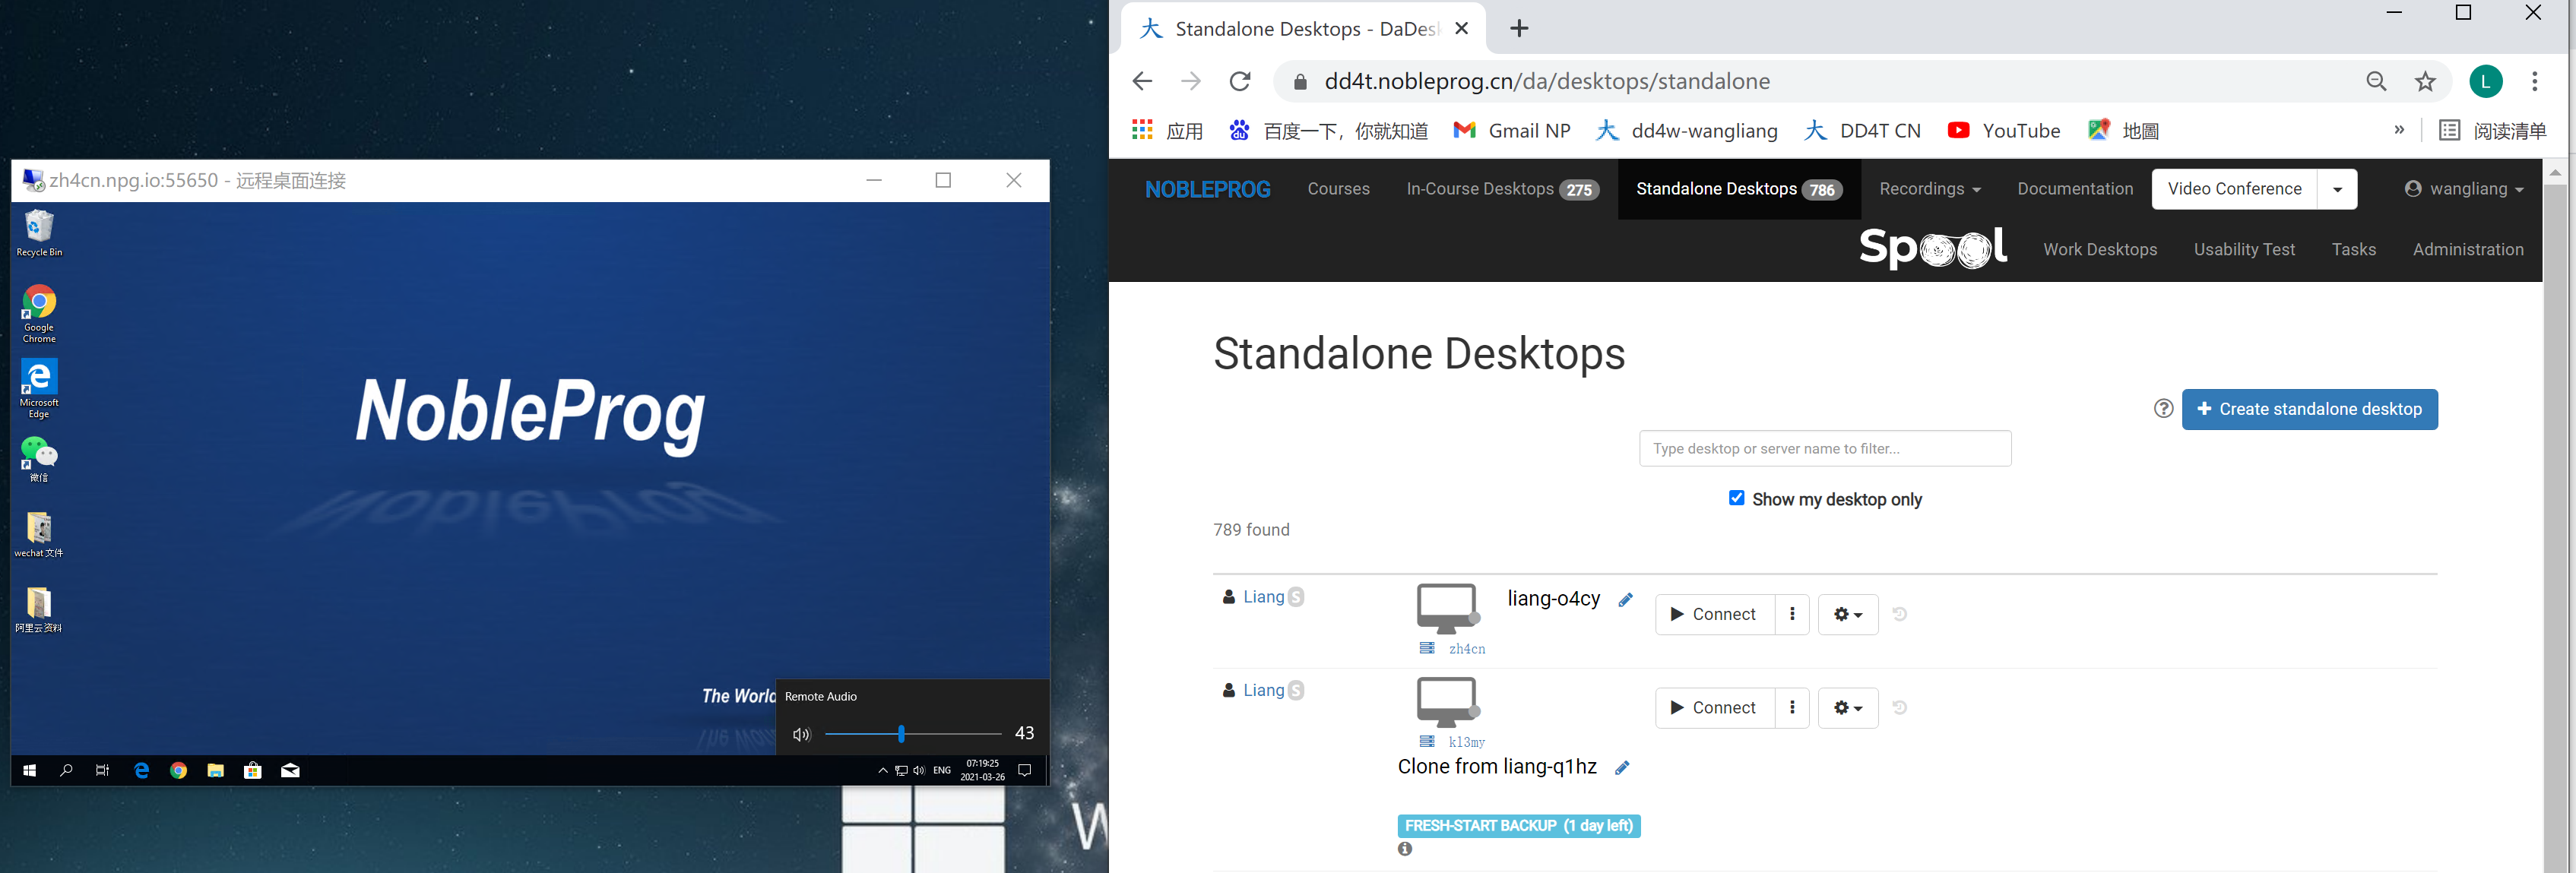
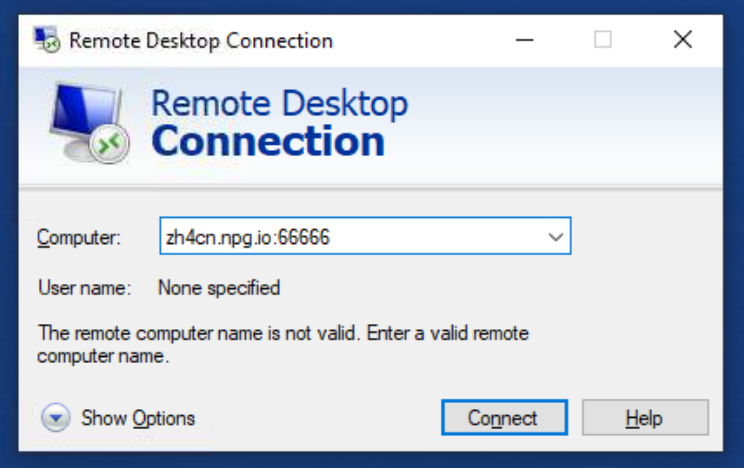
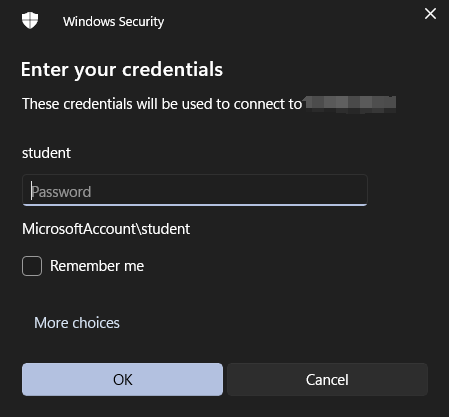
3. Now switch back to your Windows device, open Remote Desktop, and enter the server name plus your TCP port (e.g., zh4cn.npg.io:xxxxx). Click 'Show options' to adjust the resolution of the remote desktop window if you like.
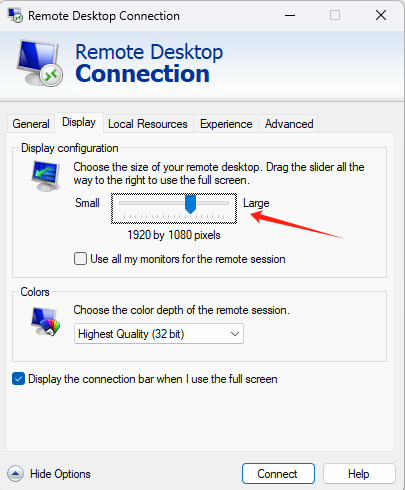
3.1 To log into your DaDesktop remote desktop, by default:
"You should reset your username and password in the machine first."
Then connect to the remote desktop.
4. After that, you'll have a remote desktop using the DD template and sound card from your own device, and you can easily copy, paste, or export documents. (The small window on the left shows the DD remote desktop with audio.)