Managing Recordings (Beta)
You can now manage your course’s recordings and videos right from the Recordings tab. While still in Beta, this tool lets you build Modules, edit footage, trim clips, and more.
Recording Management Button
Within the recordings tab, you'll spot a large blue button on the left labeled "Recording Management". Over time, as you capture sessions during the course, your recordings will show up here, possibly tagged as Trainer, Training Room, or Participant.
If you know you've made some recordings but they haven't appeared yet, just click the refresh button next to the "Recording Management" button.
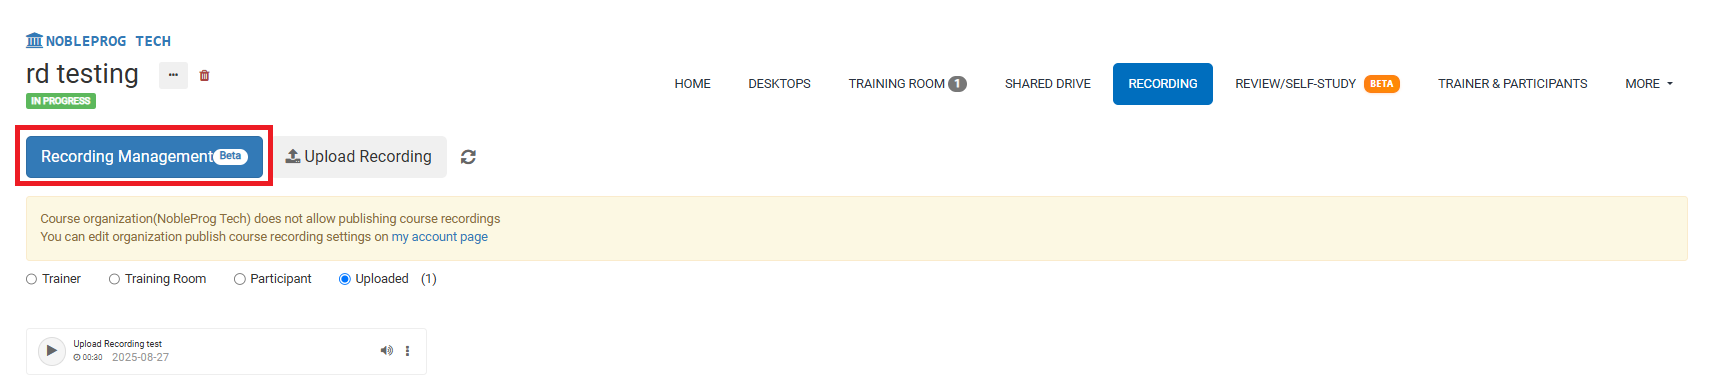
Click that button to open a new pop-up screen.
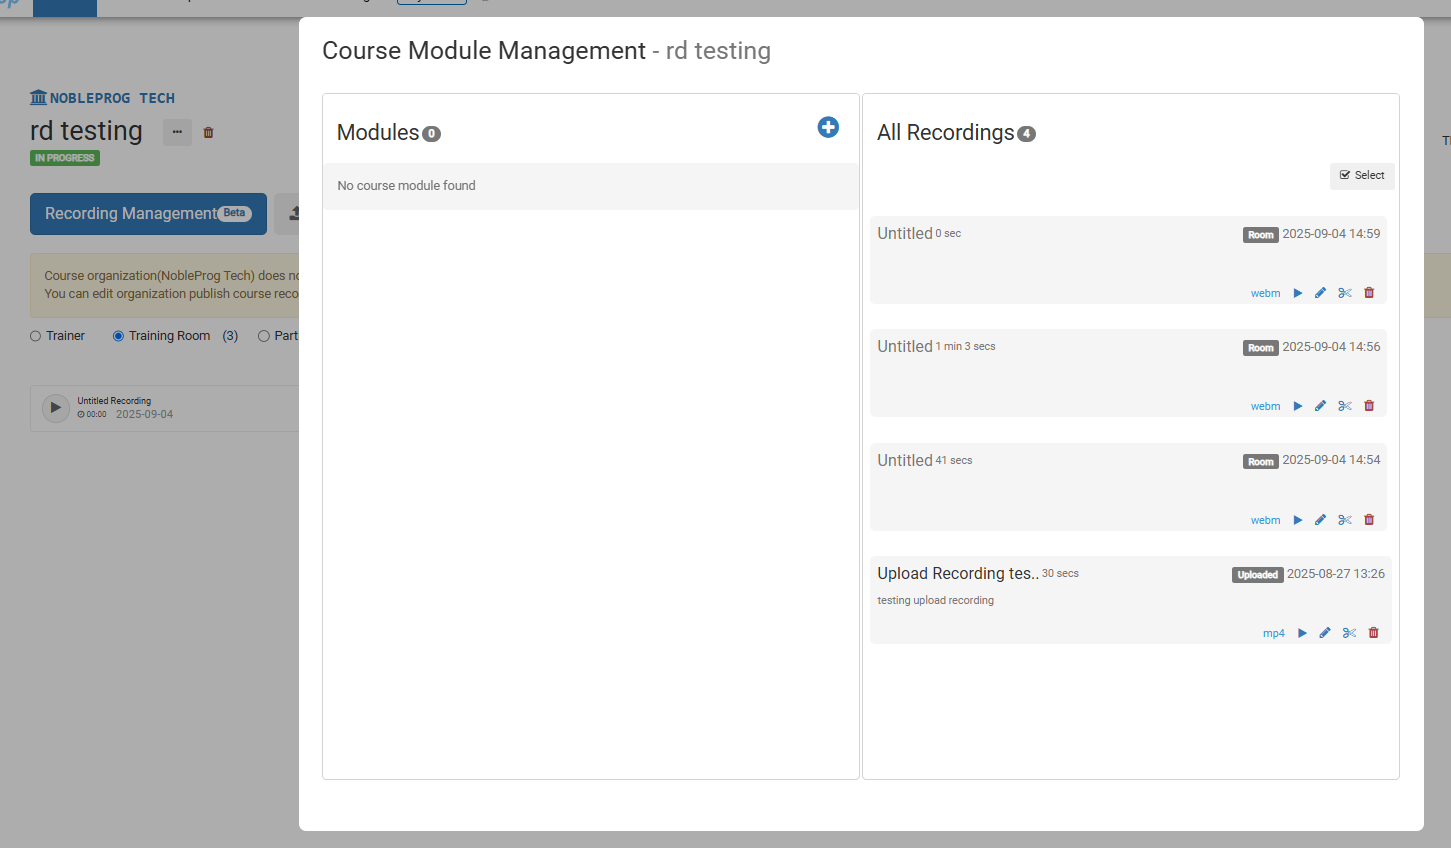
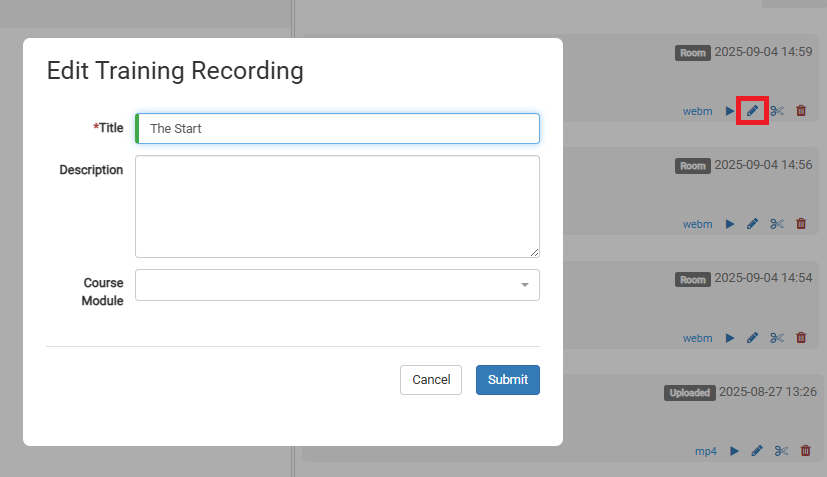
From here, editing a video is just a click on its pencil icon.
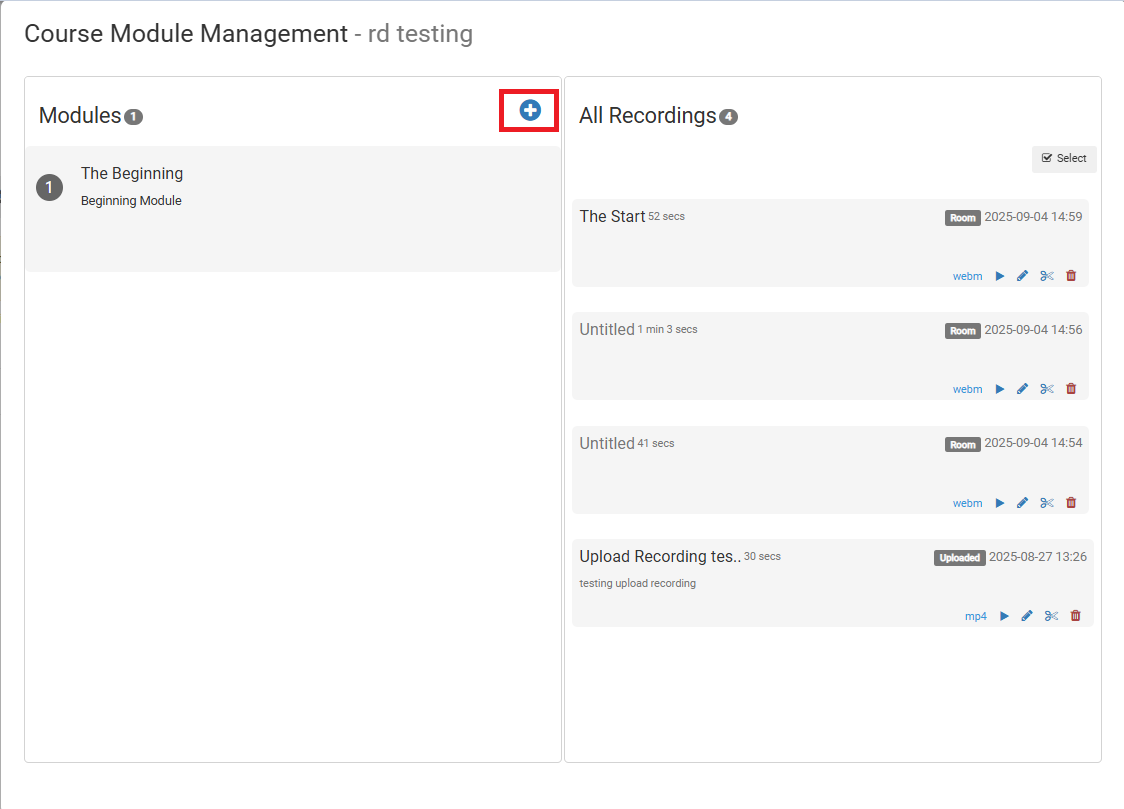
To set up Modules, click the (+) icon beneath the Modules box.
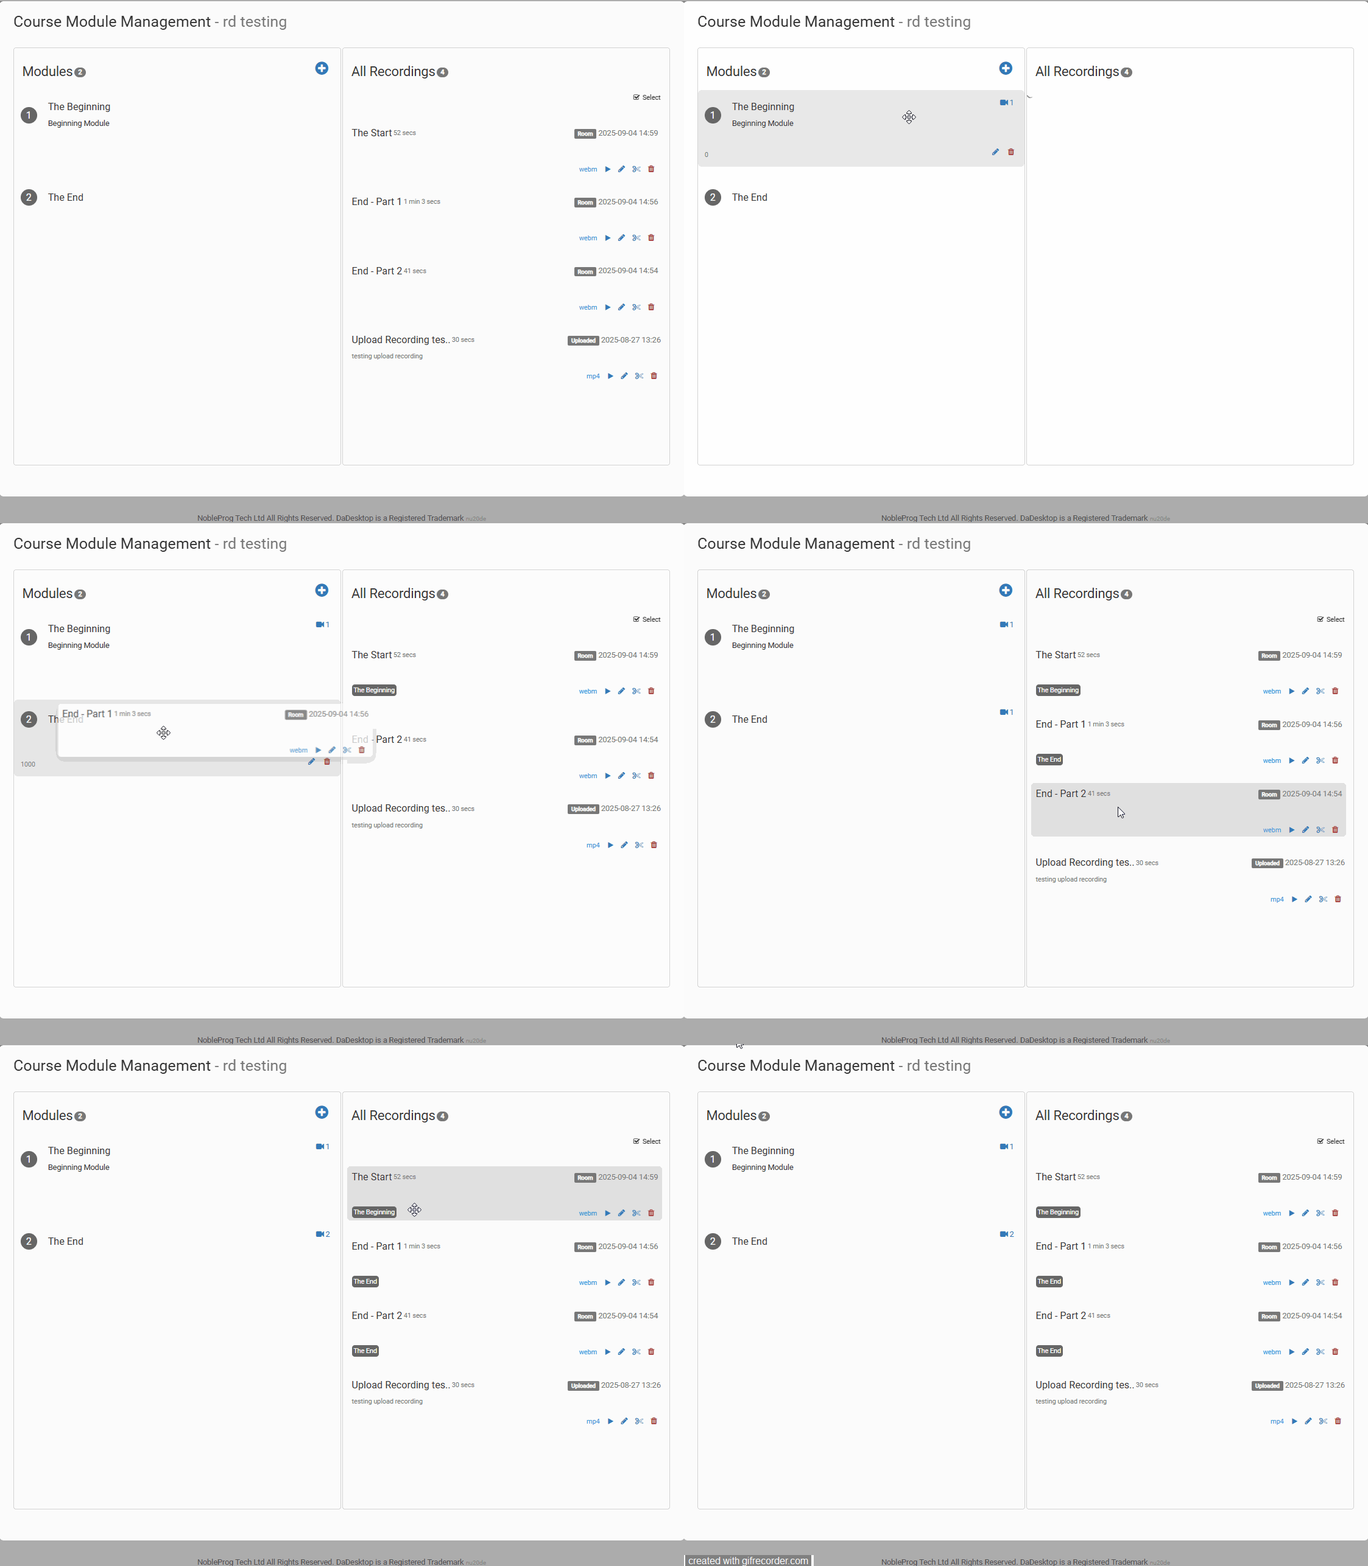
After creating your modules, you can begin organizing videos into them. You can simply drag and drop recordings,
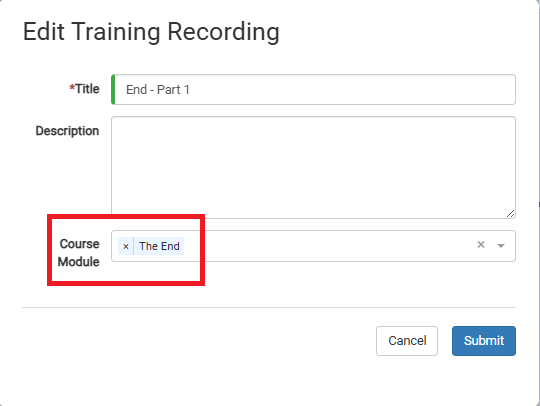
or assign them manually while editing a video.
Video Editing
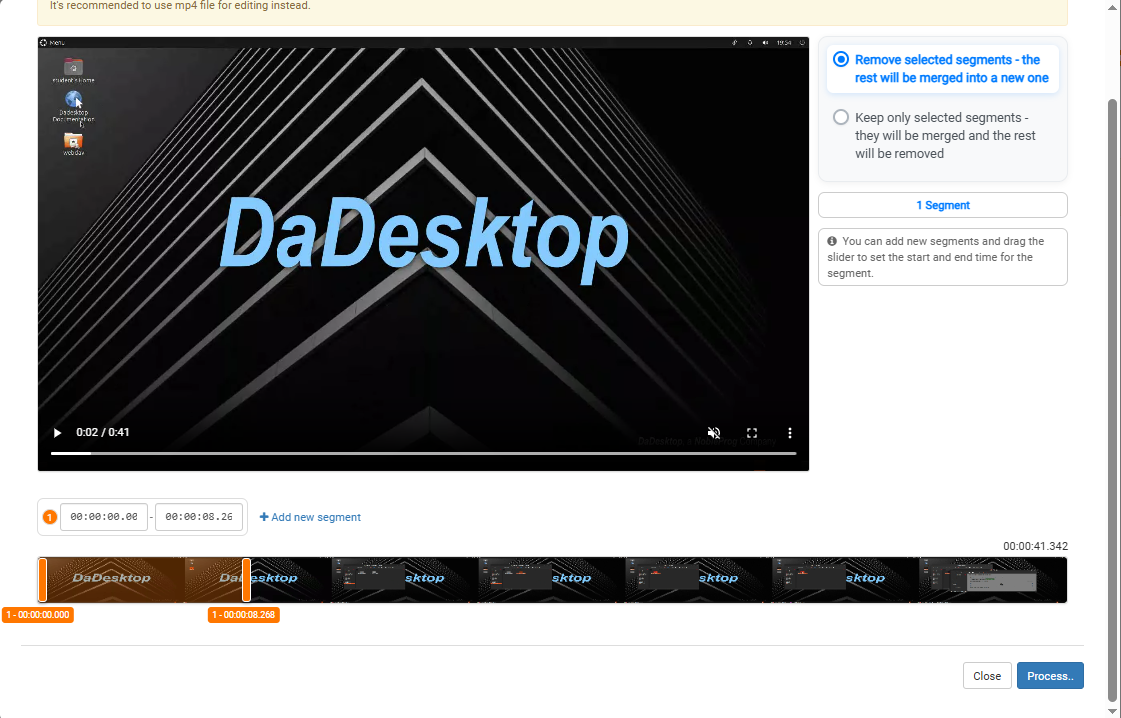
You can perform basic video edits. Maybe your recording includes moments where you paused or searched for a file—keep those out of your final demonstration. Click the scissors icon on any video to tweak and trim it.

That opens an Edit/Cut Recording window where you can scrub through and cut your video. Once you're satisfied, process the video to render your updates.