Creating Standalone Desktops
To set up a standalone desktop, follow these steps:
- Select 'Standalones' from the top menu.
- Click 'Create New Standalone' Desktop.
- A dialogue box will appear, as shown below.
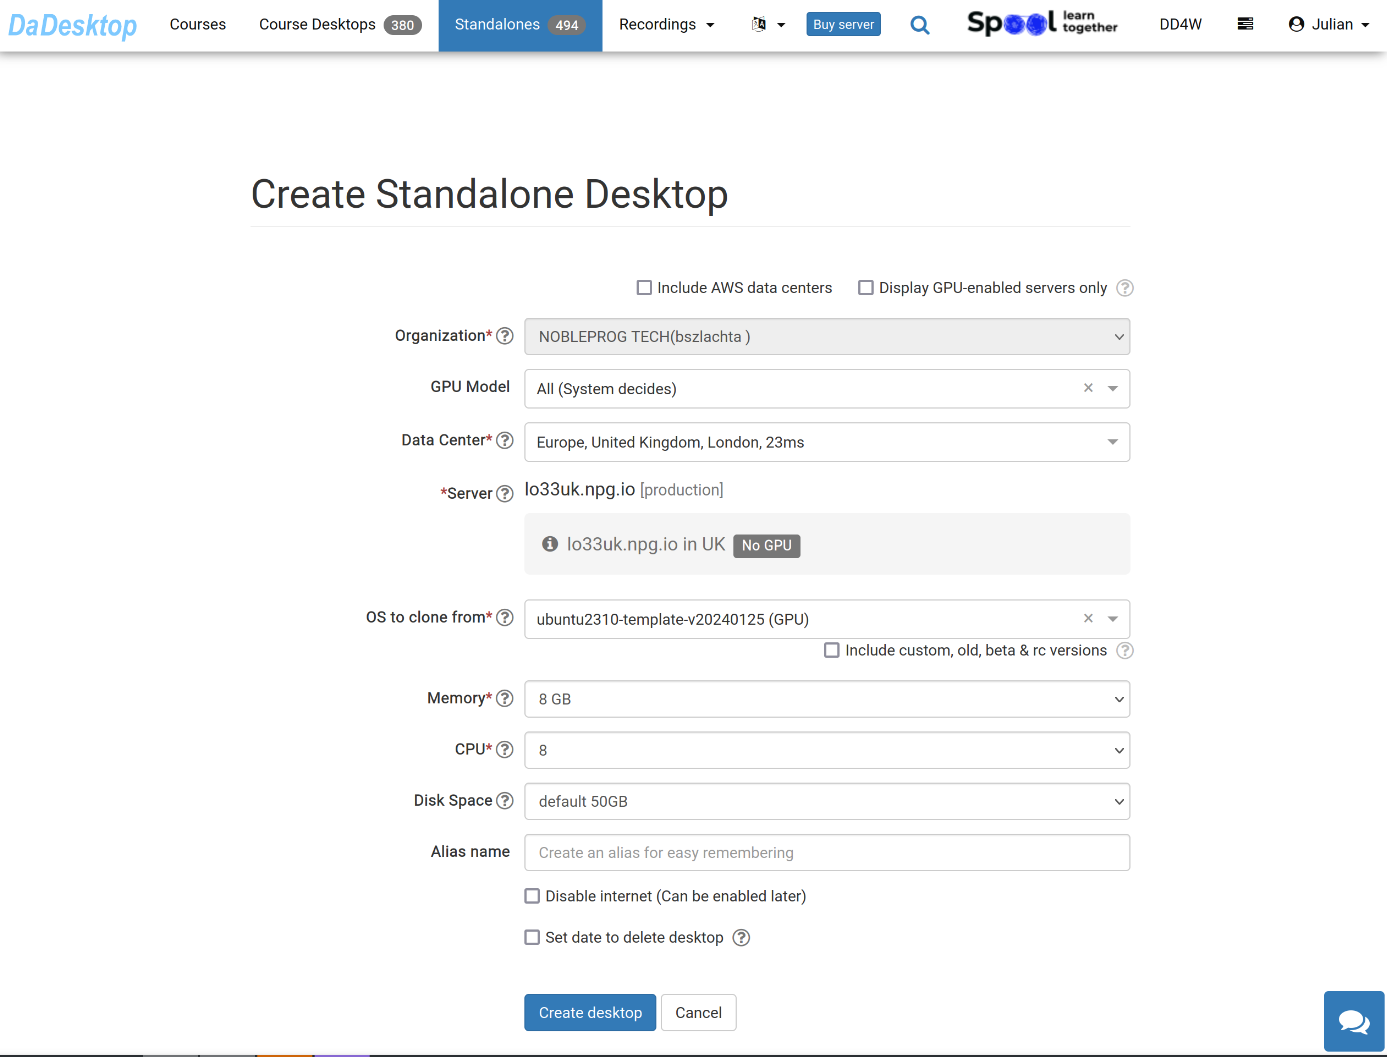
Here's a breakdown of what each field means:
-
GPU Model
Pick the GPU and its type if needed. By ticking 'Display GPU enabled servers', you'll only see servers that currently have GPUs available. -
Datacentre / Server
Choose the datacentre region and the server nearest to your location. -
OS to clone from
A range of different operating systems are at your disposal.
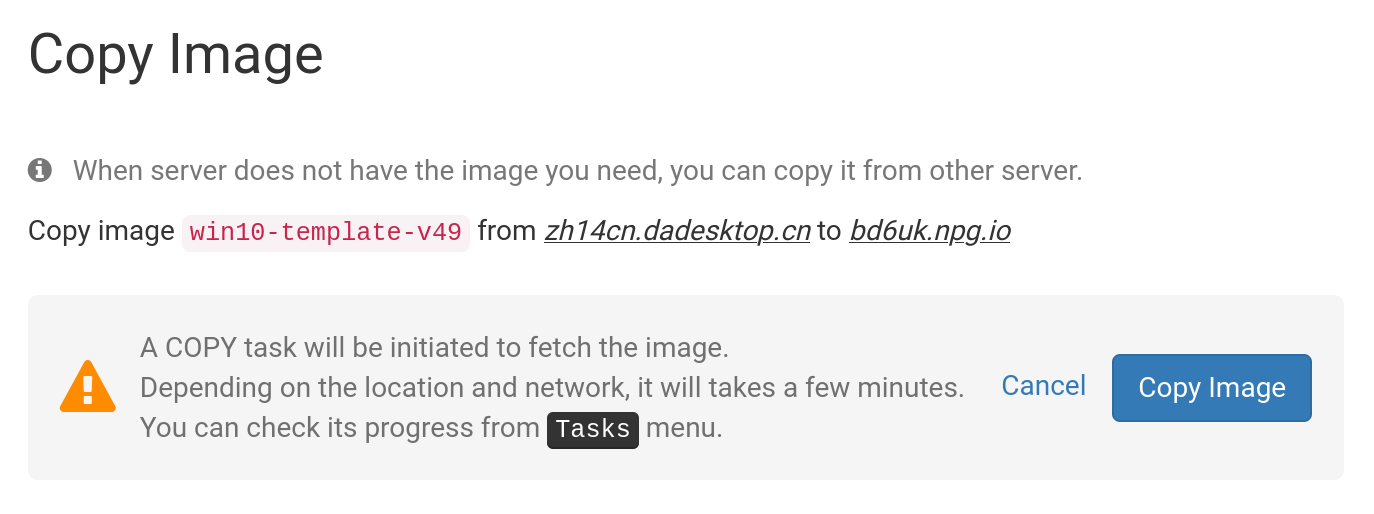
If a template is marked 'Copy Required', it is available but first needs to be copied to that server before you can use it. As a rule, only Windows OS templates might involve extra charges. -
Include Custom, RC, and Old Versions
We update OS templates regularly at DaDesktop. Still, if you run into any issues with the latest template, you can always try an older version.
-
Memory
This sets the memory limit for the desktops. Keep in mind that, by default, you're bound by the server's resources. Each server has its own memory limits. If you need these raised, reach out to us on Support Chat. -
Label
Enter an alias here if you want a simpler, more memorable label for your standalone.
OS Template to Clone from
When picking the operating system template, you have several options.
You can select Windows or explore various Linux distributions like Ubuntu, Debian, AlmaLinux, and others.
A pre-built template, usually shown with a version number such as V51, is ready to go right away.
As an alternative, we now offer the capacity to build fully up-to-date Linux templates. The 'Build New' Linux templates rely on a totally different build system. It uses the Linux sources together with a script that adds the essential DaDesktop customizations. This approach ensures the template is always completely current, fully secure, and simpler to deploy and maintain.
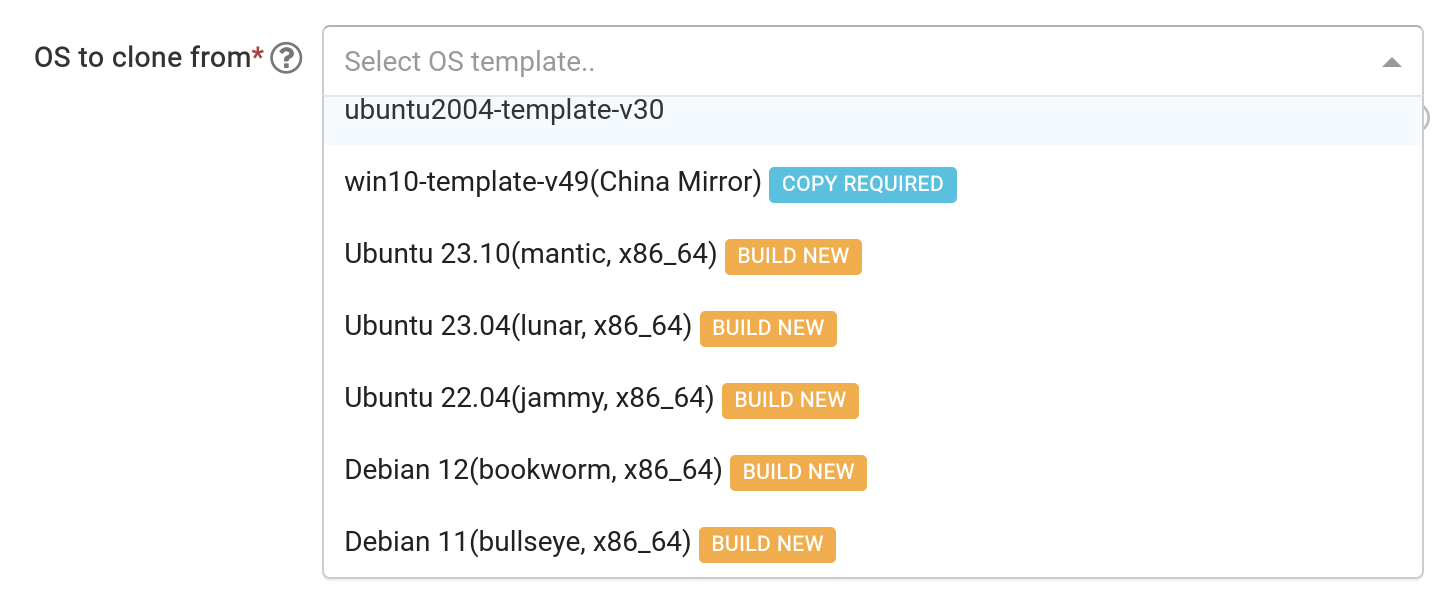
Building OS Template
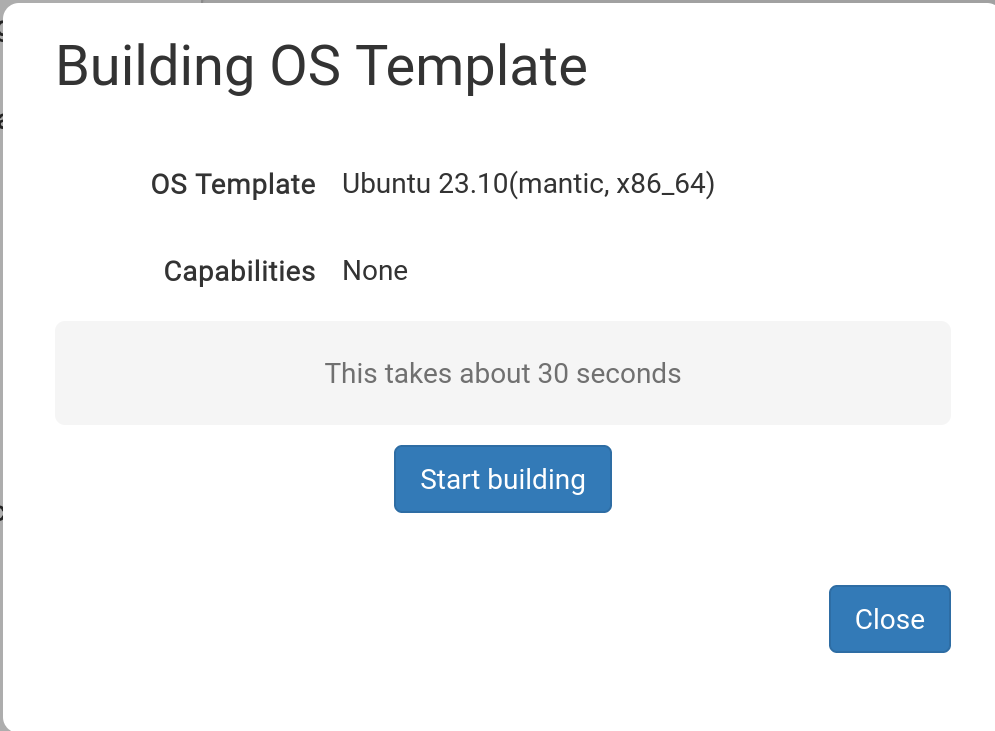
Once you've selected the desired template, a pop-up like the one below will appear.
Click 'Start Building'
Your standalone will now be built. Just a heads-up: the build process can take more than 30 seconds, and if it seems to stall, you'll simply need to wait a little longer.
Built template now available

After the template is built, you can adjust any options as you see fit, and then click 'Save and Create Desktop'.
Your Standalone is now being created. This usually takes just a few moments—much quicker than building the template itself.
Your new Standalone is ready to go. In the example below, it's named 'julian-6iqm', but you could have assigned a more descriptive label if you preferred.
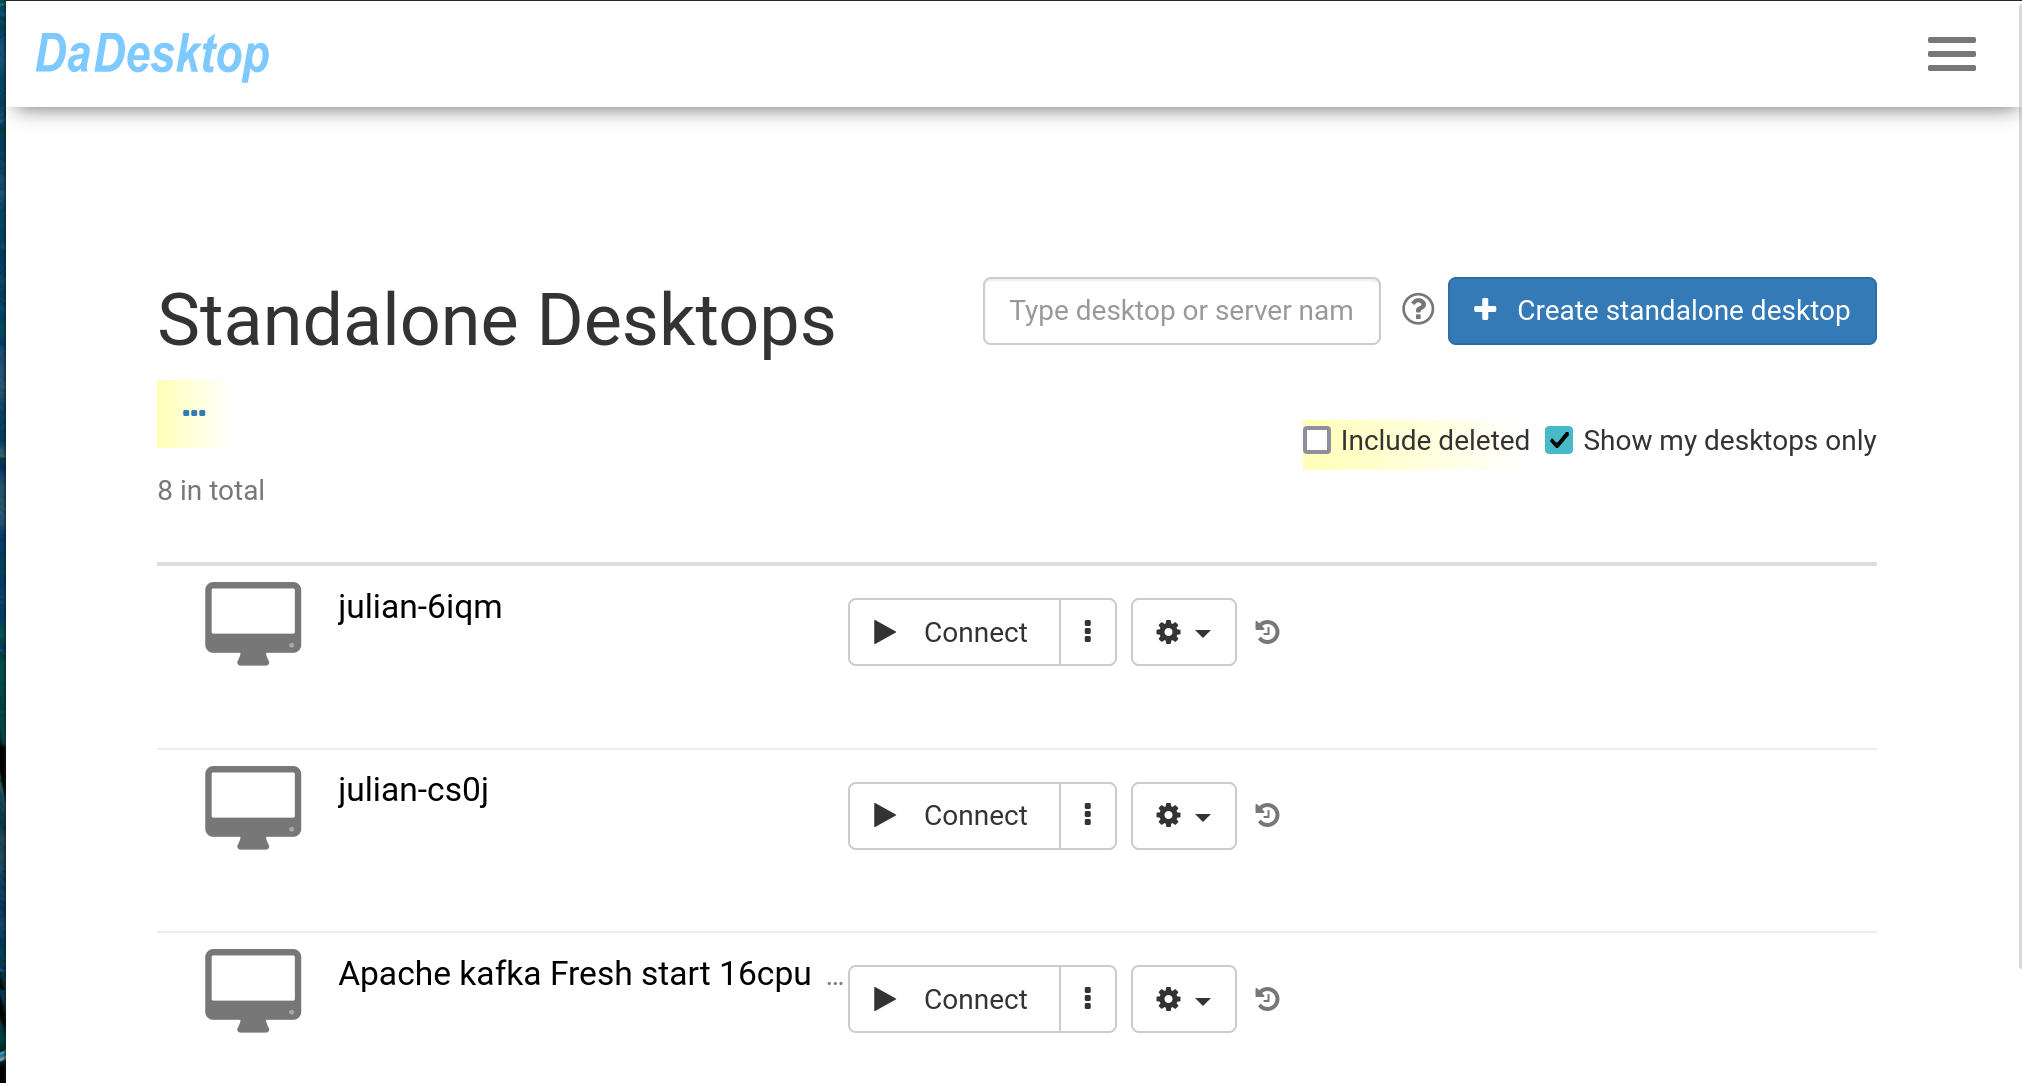
Click 'Connect' to launch and connect to the Standalone machine.